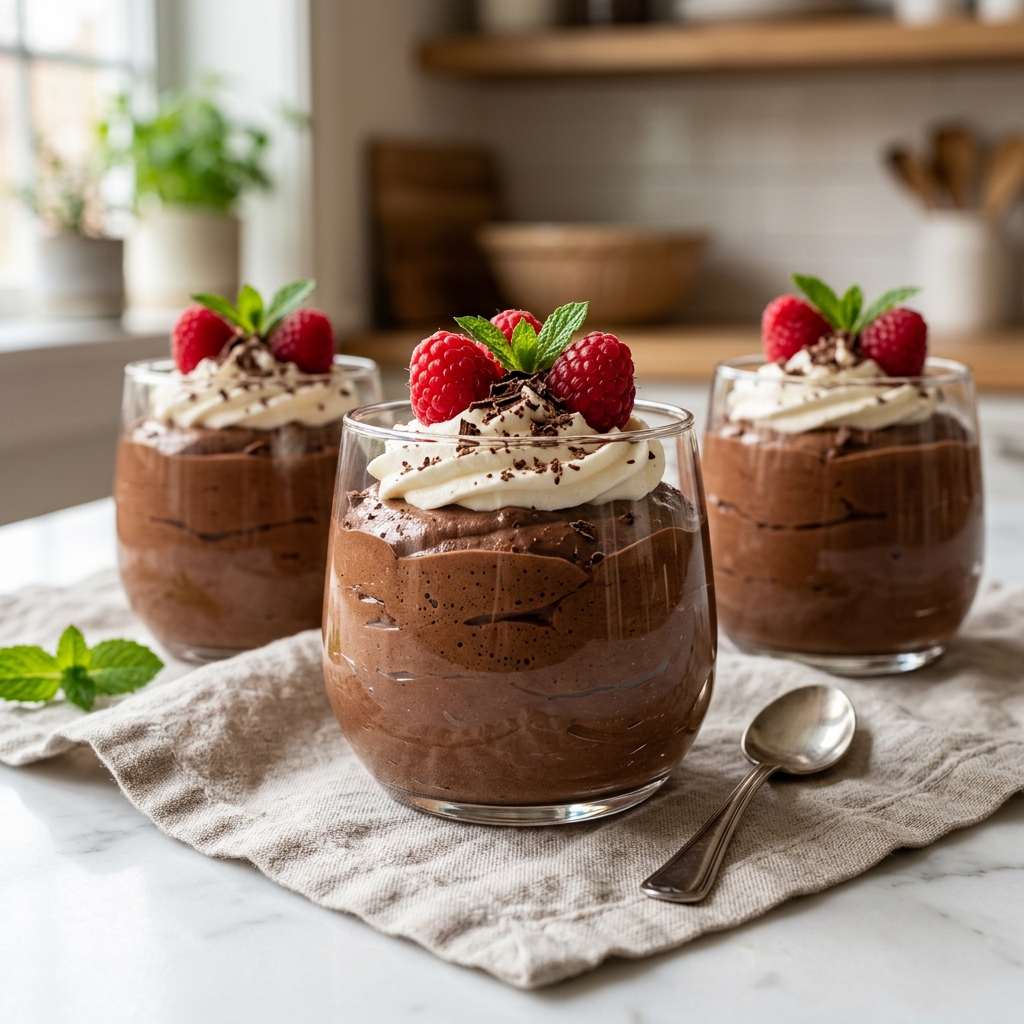
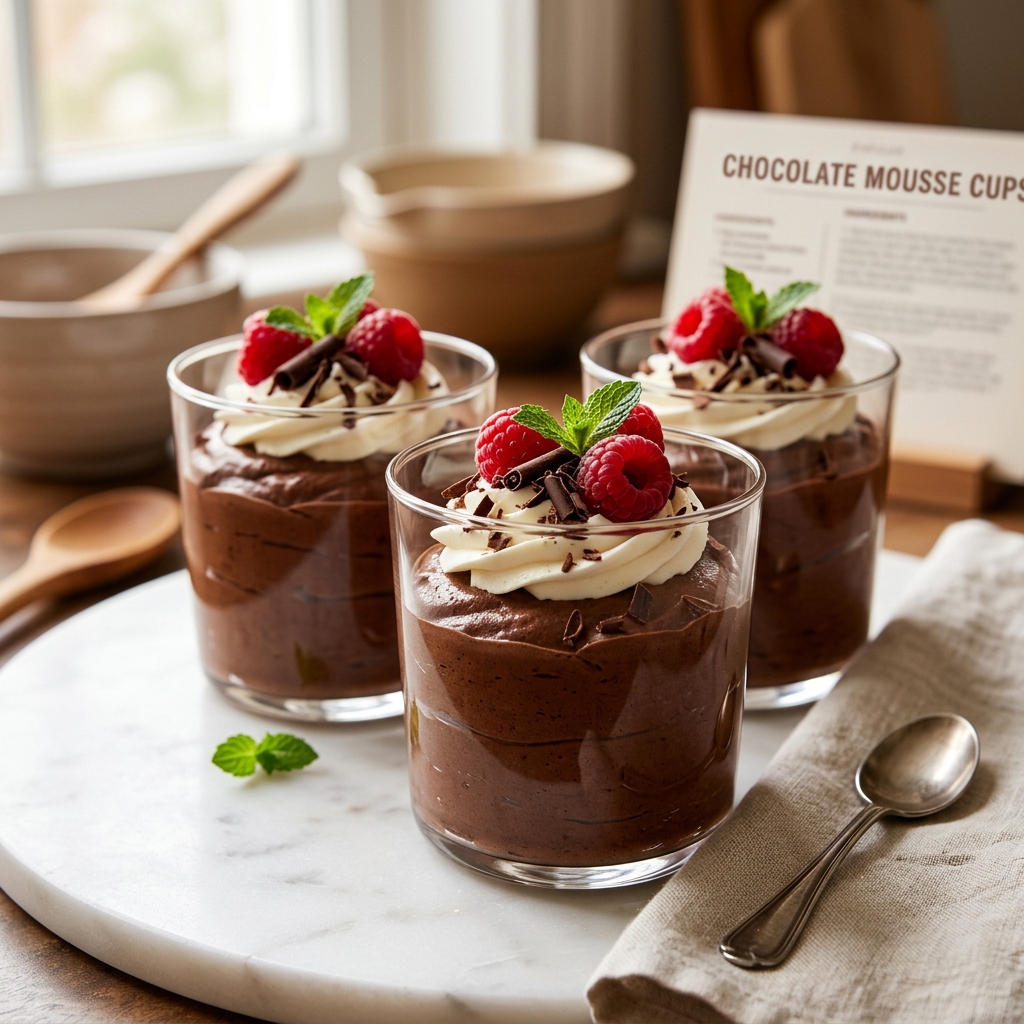
There is something undeniably luxurious about a perfectly made chocolate mousse. Light yet rich, airy yet indulgent, it’s the kind of dessert that feels like a special occasion—even when you’re simply treating yourself at home. These Chocolate Mousse Cups take that classic elegance and make it incredibly easy, transforming a traditionally complex dessert into a simple, no-bake masterpiece that anyone can create.
Imagine dipping your spoon into a silky, velvety layer of deep chocolate goodness, topped with clouds of whipped cream and bursts of fresh berries. Each bite melts effortlessly, delivering a balance of sweetness, richness, and freshness that lingers just long enough to make you crave another spoonful. This is not just dessert—it’s an experience.
The best part? You don’t need an oven, complicated techniques, or hours in the kitchen. With just a few carefully selected ingredients and the right method, you can create a stunning dessert that looks like it came straight out of a high-end restaurant. Whether you’re preparing for guests, a romantic evening, or simply elevating your everyday treats, these mousse cups are guaranteed to impress.
Why This Chocolate Mousse Will Surprise You
At first glance, chocolate mousse might seem intimidating. Many recipes call for tempering eggs, precise timing, or advanced techniques that can discourage even passionate home cooks. But this version changes everything. It’s designed to give you the same luxurious texture and rich flavor without the stress.
What makes this recipe truly special is its balance between simplicity and sophistication. You’re not just making a quick dessert—you’re crafting something that looks visually stunning, tastes deeply indulgent, and feels professionally made. The layers, the toppings, and the presentation all come together to create a dessert that’s both approachable and impressive.
Even more exciting is how customizable it is. Once you master the base mousse, you can transform it into countless variations—adding flavors, textures, and toppings to suit your mood or occasion. This means one recipe can become your go-to for endless dessert creativity.
Ingredients for Chocolate Mousse Cups
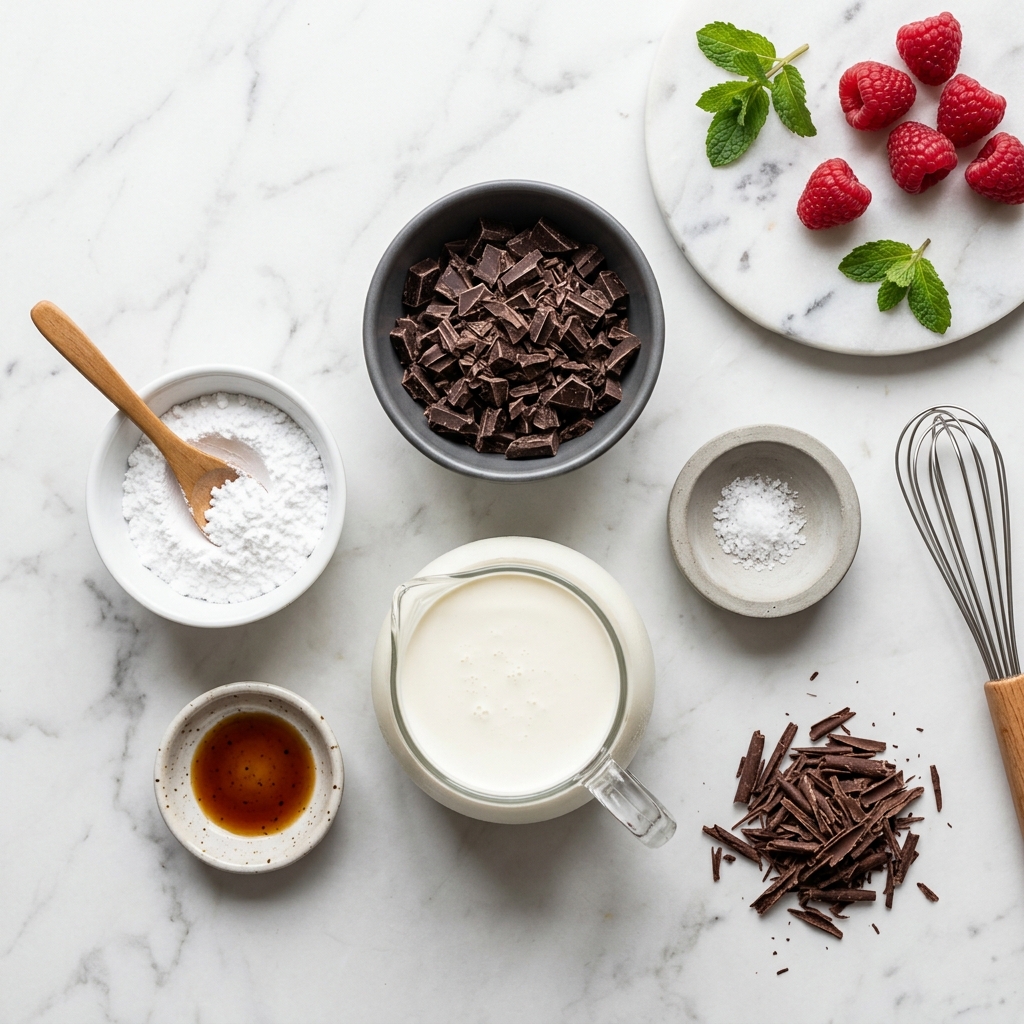
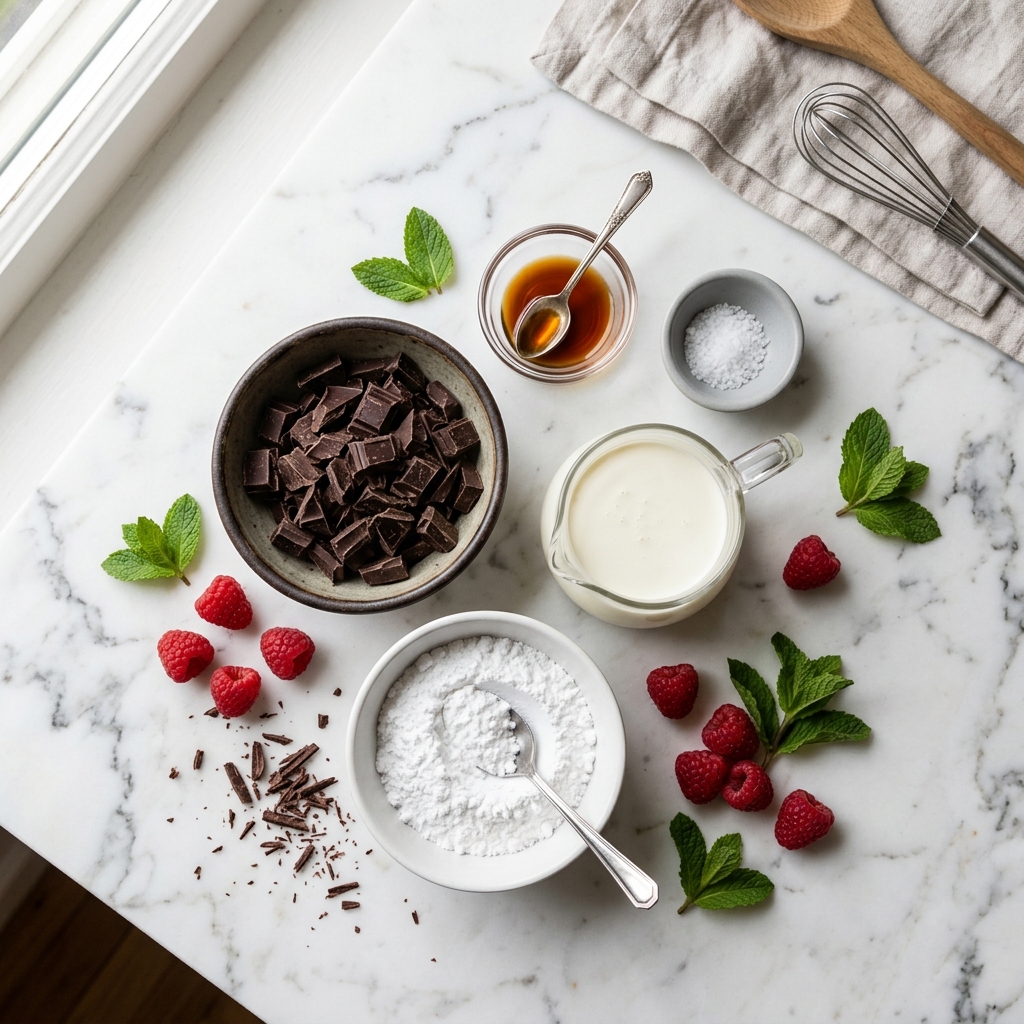
Creating the perfect chocolate mousse starts with choosing the right ingredients. Each component plays a crucial role in building the flavor, texture, and overall experience.
Core Ingredients
- Dark Chocolate (200g / 7 oz)
Use high-quality dark chocolate with at least 60–70% cocoa content. This ensures a deep, rich flavor without being overly sweet. The better the chocolate, the better your mousse will taste. - Heavy Cream (1 ½ cups / 360 ml)
This is what gives the mousse its creamy, airy texture. Make sure it is cold before whipping for the best results. - Powdered Sugar (2–3 tablespoons)
Adds a gentle sweetness and helps stabilize the whipped cream. You can adjust based on your sweetness preference. - Vanilla Extract (1 teaspoon)
Enhances the chocolate flavor and adds a subtle aromatic depth. - Salt (a pinch)
A small but powerful addition that balances sweetness and intensifies the chocolate flavor.
Optional Garnishes
- Fresh raspberries or strawberries
- Chocolate shavings or curls
- Cocoa powder dusting
- Mint leaves
- Crushed cookies or biscuit crumbs
These garnishes not only add visual appeal but also introduce contrasting textures and flavors, making each bite more exciting.
Step-by-Step Preparation Guide
Step 1: Melt the Chocolate
Begin by chopping your dark chocolate into small, even pieces. This helps it melt smoothly and evenly.
Place the chocolate in a heatproof bowl and melt it using a double boiler method or in short bursts in the microwave. If using a microwave, heat in 20–30 second intervals, stirring each time to prevent burning.
Once melted, stir until smooth and glossy, then set aside to cool slightly. It should be warm, not hot, when combined with other ingredients.
Step 2: Whip the Cream
Pour the cold heavy cream into a large mixing bowl. Using a hand mixer or stand mixer, whip the cream on medium speed until it begins to thicken.
Add the powdered sugar and vanilla extract, then continue whipping until soft peaks form. Be careful not to overwhip—the cream should be light and fluffy, not stiff or grainy.
Step 3: Combine Chocolate and Cream
Take a small portion of the whipped cream and gently fold it into the melted chocolate. This step helps lighten the chocolate and makes it easier to incorporate the rest without deflating the mixture.
Once combined, gradually fold in the remaining whipped cream using a spatula. Use slow, gentle motions to preserve the airiness of the mousse. The mixture should become smooth, light, and uniform in color.
Step 4: Assemble the Mousse Cups
Spoon or pipe the mousse into individual serving cups or glasses. For a more refined look, use a piping bag to create neat, layered swirls.
Tap the cups lightly on the surface to remove any air pockets and smooth the tops if needed.
Step 5: Chill to Perfection
Place the filled cups in the refrigerator and allow them to chill for at least 2–3 hours. This step is essential as it helps the mousse set and develop its signature texture.
Step 6: Add Garnishes
Just before serving, decorate your mousse cups with your chosen toppings. Add whipped cream swirls, fresh berries, chocolate shavings, or a dusting of cocoa powder.
Presentation is key here—simple, elegant touches can elevate the entire dessert.
Variations of Chocolate Mousse Cups
One of the most exciting aspects of this recipe is how versatile it is. Once you’ve mastered the base, you can experiment with different flavors and textures.
White Chocolate Mousse
Swap dark chocolate for white chocolate to create a sweeter, creamier version. Pair it with berries for a beautiful contrast.
Mocha Chocolate Mousse
Add a teaspoon of instant coffee or espresso powder to the melted chocolate. This enhances the chocolate flavor and adds a subtle coffee kick.
Orange Chocolate Mousse
Incorporate a bit of orange zest into the mixture for a refreshing citrus twist that pairs beautifully with chocolate.
Nutty Chocolate Mousse
Fold in finely chopped hazelnuts or almonds for added crunch and depth.
Layered Dessert Cups
Create layers with crushed cookies, caramel sauce, or fruit compote between the mousse for a more dynamic dessert experience.
Expert Tips for Perfect Chocolate Mousse
Achieving that flawless, restaurant-quality mousse comes down to a few key techniques that professionals swear by.
- Always use high-quality chocolate—it’s the backbone of the recipe
- Ensure your cream is very cold before whipping for better volume
- Let the melted chocolate cool slightly to avoid melting the whipped cream
- Fold gently to maintain the airy texture
- Chill long enough for the mousse to fully set and develop flavor
Small details like these can make the difference between a good mousse and an unforgettable one.
Make Ahead Options
One of the biggest advantages of these Chocolate Mousse Cups is how beautifully they fit into your schedule. As a chef, I always recommend desserts that can be prepared in advance without sacrificing quality—and this one does exactly that.
You can prepare the mousse up to 2 days ahead of serving. Simply follow the full recipe, portion it into serving cups, and cover each cup tightly with plastic wrap. Keep them refrigerated until you’re ready to serve. This not only saves time but actually improves the flavor, as the chocolate has more time to deepen and develop.
If you’re planning for an event or gathering, you can even prepare the mousse base a day earlier and pipe it fresh into cups on the day of serving for a just-made appearance. Garnishes, however, should always be added right before serving to maintain freshness and visual appeal.
For those who love efficiency in the kitchen, this dessert is a dream—it allows you to focus on presentation and plating when it matters most, without the stress of last-minute preparation.
What to Serve with Chocolate Mousse Cups
While these mousse cups are stunning on their own, pairing them thoughtfully can elevate your dessert experience into something truly memorable.
Fresh Fruits
The richness of chocolate pairs beautifully with fresh, slightly tart fruits. Consider serving with:
- Raspberries
- Strawberries
- Blueberries
- Sliced oranges
These fruits cut through the richness and add a refreshing balance.
Crunchy Elements
Texture is key in a great dessert. Add contrast with:
- Biscotti
- Butter cookies
- Shortbread
- Crushed graham crackers
A small crunchy side can make each bite more satisfying.
Light Beverages
To complement the richness of the mousse, pair it with:
- Freshly brewed coffee
- Espresso
- Herbal teas
- Light milk-based drinks
These beverages cleanse the palate and enhance the chocolate flavor without overpowering it.
Dessert Boards
For a more elevated presentation, include your mousse cups as part of a dessert board alongside fruits, cookies, and chocolate pieces. This works beautifully for gatherings and special occasions.
How to Store Chocolate Mousse Cups
Proper storage ensures your mousse maintains its silky texture and fresh flavor.
Store the mousse cups in the refrigerator, covered tightly with plastic wrap or in an airtight container. They will stay fresh for up to 2–3 days.
Avoid leaving them uncovered, as mousse can absorb odors from the fridge, which may affect the taste.
If you’ve already added toppings like whipped cream or fruit, it’s best to consume them within 24 hours for optimal freshness and appearance.
Can You Freeze Chocolate Mousse?
Yes, you can freeze chocolate mousse, but with some considerations.
Place the mousse in freezer-safe containers and freeze for up to 1 month. When ready to use, thaw it in the refrigerator overnight. Keep in mind that freezing may slightly alter the texture, making it a bit denser.
Interestingly, some people enjoy frozen mousse as a semi-frozen dessert—it takes on a texture similar to ice cream.
Frequently Asked Questions (FAQs)
1. Can I use milk chocolate instead of dark chocolate?
Yes, you can substitute milk chocolate if you prefer a sweeter and lighter flavor. However, keep in mind that milk chocolate contains more sugar and less cocoa, so the mousse will be less intense and slightly softer in texture.
2. Why is my mousse too runny?
This usually happens if the whipped cream was under-whipped or the chocolate was too warm when mixed. Make sure your cream reaches soft peaks and your chocolate has cooled slightly before combining.
3. Can I make this recipe without a mixer?
Absolutely. You can whip the cream by hand using a whisk. It will take more effort, but the result will be just as good if done properly.
4. How do I know when the mousse is fully set?
The mousse should feel firm yet soft to the touch and hold its shape when scooped. This typically takes at least 2–3 hours in the refrigerator, though overnight chilling is even better.
5. Can I make this dairy-free?
Yes, you can substitute heavy cream with chilled coconut cream. It whips similarly and adds a subtle coconut flavor that pairs well with chocolate.
6. What’s the best way to serve mousse for guests?
For an elegant presentation, serve mousse in clear glass cups or jars to showcase the layers. Pipe the mousse neatly and garnish just before serving for a polished, professional look.
7. Can I add gelatin to stabilize the mousse?
While not necessary for this recipe, a small amount of dissolved gelatin can be added if you want a firmer texture, especially for warmer environments or longer serving times.
Conclusion
Chocolate Mousse Cups are more than just a dessert—they’re a statement of simplicity meeting elegance. With minimal ingredients and no baking required, you can create something that feels luxurious, tastes indulgent, and looks absolutely stunning.
What makes this recipe truly special is its versatility and reliability. Whether you’re a beginner stepping into the world of desserts or an experienced home cook looking for a quick yet impressive treat, this mousse delivers every time. It adapts to your creativity, allowing you to experiment with flavors, textures, and presentation styles.
As a chef, I always say that the best recipes are the ones that bring joy—not just in eating, but in creating. And this one does exactly that. From the smooth folding of cream into chocolate to the final garnish placed with care, every step is an opportunity to craft something beautiful.
Now that you have everything you need—from technique to tips—you’re fully equipped to master these Chocolate Mousse Cups. All that’s left is to step into your kitchen and bring this delicious vision to life.
Chocolate Mousse Cups – Easy No Bake Dessert Recipe
Ingredients
Equipment
Method
- Place chopped chocolate in a heatproof bowl and melt using a microwave in short intervals or over a double boiler. Stir until smooth, then allow to cool slightly.
- In a large bowl, whip the cold heavy cream until it begins to thicken. Add powdered sugar and vanilla extract, then continue whipping until soft peaks form.
- Add a small portion of whipped cream into the melted chocolate and gently mix to loosen the texture.
- Gradually fold the remaining whipped cream into the chocolate using a spatula. Mix gently to maintain a light, airy texture.
- Spoon or pipe the mousse into serving cups or glasses. Smooth the tops if needed.
- Refrigerate for at least 2–3 hours until set.
- Top with whipped cream, fresh berries, chocolate shavings, or mint leaves before serving.
Notes
Do not overwhip the cream, as it can become grainy.
Ensure the chocolate is not too hot when mixing to prevent deflating the cream.
Chill thoroughly for the perfect mousse consistency.
Garnish just before serving for the freshest look and taste.